Homemade Cheese Sticks: The Addictive Party Snack for Any Occasion
There are few snacks as universally adored as the humble cheese stick. That magical moment when the crispy, golden exterior gives way to a ribbon of warm, gooey, melted cheese is pure comfort. Whether you're hosting a sophisticated soirée, settling in for a cozy movie marathon, or planning the ultimate spread for a major event like Oscar night, homemade cheese sticks are a guaranteed showstopper. Forget the frozen aisle; crafting these delightful bites at home is surprisingly simple, deeply satisfying, and allows for endless customization that will elevate any gathering from ordinary to unforgettable.
From their speedy preparation to their undeniable crowd-pleasing charm, these homemade wonders are more than just a snack – they're an experience. Imagine the delighted murmurs as guests pluck a perfectly golden stick, crunch through its seasoned crust, and pull apart the stringy, cheesy goodness within. It’s a sensory delight that instantly transports you back to carefree moments and joyful celebrations. Let's dive into why these crispy, gooey marvels are about to become your new go-to party staple, especially when planning for those grand events like needing the perfect cheese sticks for Oscar night.
The Irresistible Allure of Homemade Cheese Sticks
What makes homemade cheese sticks so utterly addictive? It's a symphony of textures and flavors that store-bought versions simply can't replicate. The secret lies in the freshness and control you have over every ingredient. You start with high-quality cheese, coat it in a perfectly seasoned, ultra-crispy breading, and fry it to golden perfection, ensuring a hot, melty center every single time. This isn't just a snack; it's a culinary hug.
The beauty of making them from scratch extends beyond taste. It's about the ability to customize every element. Want a little extra kick? A pinch of cayenne pepper in the breading can transform them into Spicy, Crispy Cheese Sticks: Your Go-To for Oscar Night Parties. Prefer a herby twist? Add dried oregano or Italian seasoning. This level of personalization ensures that your cheese sticks cater exactly to your palate and the preferences of your guests, making them a truly unique offering at any party.
Why Homemade Cheese Sticks are Your Oscar Night MVP
Oscar night is an occasion of glitz, glamour, and often, lengthy acceptance speeches. It calls for a snack that is both easy to prepare and easy to enjoy, leaving you free to focus on the red carpet fashion and memorable cinematic moments. This is precisely where cheese sticks for Oscar night shine as the undisputed MVP.
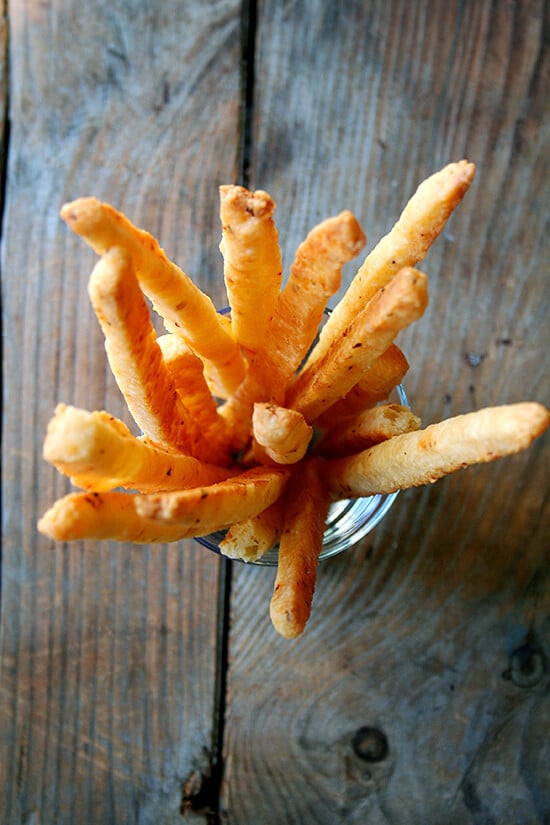
Imagine this: the nominations are announced, the suspense builds, and you effortlessly present a platter of elegant, golden "cheese cocktail straws" – a more refined name for these delightful bites. They're party-friendly, meaning no awkward cutlery or complicated plating. Guests can simply grab, dip, and mingle, making them ideal for a dynamic viewing party. Even if, like many, you've been distracted by other captivating entertainment (hello, Foyle's War!), and haven't managed to see a single nominated movie, you can still host an absolutely fabulous Oscar party with these cheesy delights. They take just minutes to whip up, look beautiful, and satisfy that universal craving for something salty, savory, and utterly comforting.
Their versatility also means you can prepare them ahead of time, doing the initial coating, and then simply fry them fresh just before serving. This minimal fuss-factor is crucial when you want to enjoy the festivities rather than being tethered to the kitchen. With simple, wholesome ingredients like butter, cheese, salt, and a touch of spice, these cheese sticks are a surefire hit that require minimal effort for maximum impact, guaranteeing your Oscar night spread is remembered.
Crafting Perfection: Your Go-To Homemade Cheese Stick Recipe
Ready to transform humble cheese into a crispy, gooey masterpiece? This recipe is a breeze, requiring just a few simple ingredients and minimal prep time. The key to success lies in quality ingredients and a straightforward dredging process that ensures a perfect coating every time.
Essential Ingredients for Glorious Gooeyness & Crunch
The magic starts with the right foundation. Here’s what you’ll need:
- String Cheese or Low-Moisture Mozzarella Sticks: This is the heart of your cheese stick. Low-moisture mozzarella is crucial for that perfect gooey, stretchy melt without becoming watery. String cheese sticks are incredibly convenient as they are already portioned.
- Panko Breadcrumbs: The secret to an ultra-crispy, airy coating. While regular breadcrumbs can work in a pinch, panko offers an unparalleled crunch.
- All-Purpose Flour: Helps create a dry surface on the cheese, allowing the egg wash to adhere better. For a gluten-free option, swap with your preferred GF flour blend.
- Eggs: The binding agent! Beaten eggs create a sticky surface for the breadcrumbs. For a delightful vegan alternative, a flax egg can be used.
- Vegetable Oil (for frying): Essential for achieving that golden, crispy texture. Any neutral oil like canola, sunflower, or peanut oil will do.
- Seasonings: Salt and freshly ground black pepper are a must. For a subtle kick, consider adding a pinch of cayenne pepper, smoked paprika, or a dash of garlic powder to your panko breadcrumbs.
Step-by-Step Guide to Crispy, Melty Magic
Making these delightful bites at home is not only simple but also incredibly satisfying. Follow these steps for crispy, gooey perfection:
- Prep Your Cheese: If using a block of low-moisture mozzarella, cut it into stick-like portions, roughly ¼ to ½ inch thick and 3-4 inches long. Pat them dry with paper towels to remove any excess moisture, which helps the coating stick.
- Set Up Your Dredging Station: Grab three shallow bowls. In the first, place your all-purpose flour seasoned with a pinch of salt and pepper. In the second, whisk your eggs until light and frothy. In the third, pour your panko breadcrumbs, seasoned with your chosen spices (e.g., salt, pepper, garlic powder, cayenne).
- Coat the Cheese: Take each cheese stick and dredge it first in the flour, ensuring it's fully coated, then shake off any excess. Next, dip it into the beaten egg, letting any extra drip off. Finally, roll it generously in the panko breadcrumbs, pressing gently to ensure an even, thick coating. For an extra crispy crust, you can double coat by dipping the breaded stick back into the egg and then into the panko again.
- Chill for Success: Place your coated cheese sticks on a parchment-lined baking sheet and freeze them for at least 30 minutes, or up to several hours. This is a crucial step! Chilling or freezing helps the coating adhere firmly and prevents the cheese from melting too quickly during frying, ensuring a perfect gooey interior and intact crust.
- Preheat Your Oil: While the cheese chills, heat about 2-3 inches of vegetable oil in a deep frying pan or Dutch oven over medium-high heat. Use a kitchen thermometer to ensure the oil reaches 350°F (175°C). Maintaining the correct oil temperature is key to perfectly crispy, non-greasy cheese sticks. For more detailed insights into achieving that perfect crisp, refer to Mastering Crispy & Gooey Cheese Sticks: A Quick 15-Minute Recipe.
- Fry to Golden Perfection: Carefully lower a few chilled cheese sticks into the hot oil, ensuring not to overcrowd the pan. Fry for 1-2 minutes per side, or until they are beautifully golden brown and crispy. Keep an eye on them, as they cook quickly!
- Drain and Serve: Use tongs or a slotted spoon to remove the fried cheese sticks from the oil and place them on a plate lined with paper towels to drain any excess oil. Serve immediately for the ultimate gooey experience!
Beyond the Basics: Customization & Dipping Delights
While the classic cheese stick is a marvel on its own, its true party potential is unleashed through creative customization and an array of tempting dipping sauces. This is where you can truly make them your own and cater to diverse tastes.
Dipping Delights
The right dip can elevate your cheese sticks from great to extraordinary. Here are some crowd-pleasing options:
- Classic Marinara Sauce: You can't go wrong with this timeless pairing. Its tangy, savory notes perfectly cut through the richness of the cheese.
- Creamy Ranch Dressing: A beloved option that adds a cool, zesty twist that friends and family will rave about.
- Spicy Aioli: For those who love a bit of heat, a homemade spicy aioli (mayonnaise mixed with sriracha, garlic, and a squeeze of lime) provides a fantastic kick.
- Sweet-Savory Honey Mustard: A surprisingly delicious option, offering a delightful contrast to the salty cheese.
- Pesto Aioli: Blend pesto with mayonnaise for an herbaceous, garlicky dip.
- Guacamole or Salsa: For a Tex-Mex twist, especially if you've used pepper jack cheese.
Creative Customization Ideas
Don't stop at the standard! Here's how to inject even more personality into your homemade cheese sticks:
- Cheese Varieties: While mozzarella is traditional, experiment with other meltable cheeses like provolone, cheddar, Monterey Jack, or even a blend for a more complex flavor profile. Pepper Jack adds a lovely spicy note.
- Herb-Infused Breading: Mix finely chopped fresh herbs like parsley, chives, oregano, or a blend of Italian seasoning into your panko breadcrumbs for an aromatic boost.
- Spice it Up: Beyond cayenne, consider a pinch of smoked paprika, chili powder, or even a dash of Old Bay seasoning for a unique flavor.
- Parmesan Power: Grate some Parmesan cheese into your breadcrumbs for an extra layer of salty, umami flavor.
- Different Shapes: Instead of sticks, cut cheese into small cubes for "cheese bites" or use cookie cutters for fun, themed shapes (stars for Oscar night, perhaps?).
Party Prep Tips for the Host
- Make Ahead: The coated and frozen cheese sticks can be stored in an airtight container in the freezer for up to a month. This makes last-minute party prep a breeze!
- Reheating: While best served fresh, leftover cheese sticks can be reheated in an air fryer (350°F for 5-7 minutes) or oven (375°F for 10-15 minutes) until crispy and hot.
- Presentation: Arrange them artfully on a platter with small bowls of various dipping sauces for an appealing spread. Garnish with fresh herbs for a pop of color.
Whether you're gearing up for a big game, a cozy movie night, or the ultimate celebration, these customizable, addictive homemade cheese sticks are a recipe for success.
Conclusion
Homemade cheese sticks truly are the ultimate party snack. Their irresistible combination of crispy breading and gooey, melted cheese makes them a guaranteed hit for any gathering, big or small. From casual game nights to the elegant affair of Oscar night, these delightful bites offer comfort, flavor, and a touch of homemade magic that store-bought versions simply can't match. They're quick, customizable, and always disappear first from the platter.
So, the next time you're planning a party or just craving a deeply satisfying snack, bypass the frozen aisle. Grab your mozzarella, set up your dredging station, and get ready to whip up a batch of these glorious, addictive cheese sticks. Your guests (and your taste buds!) will thank you for this simple yet spectacular indulgence.
